Quick Start
After installing the Headlamp-KAITO plugin, you can quickly deploy and interact with AI models through Headlamp's intuitive interface.
Prerequisites
Before starting, ensure you have:
- Headlamp installed with the Headlamp-KAITO plugin enabled
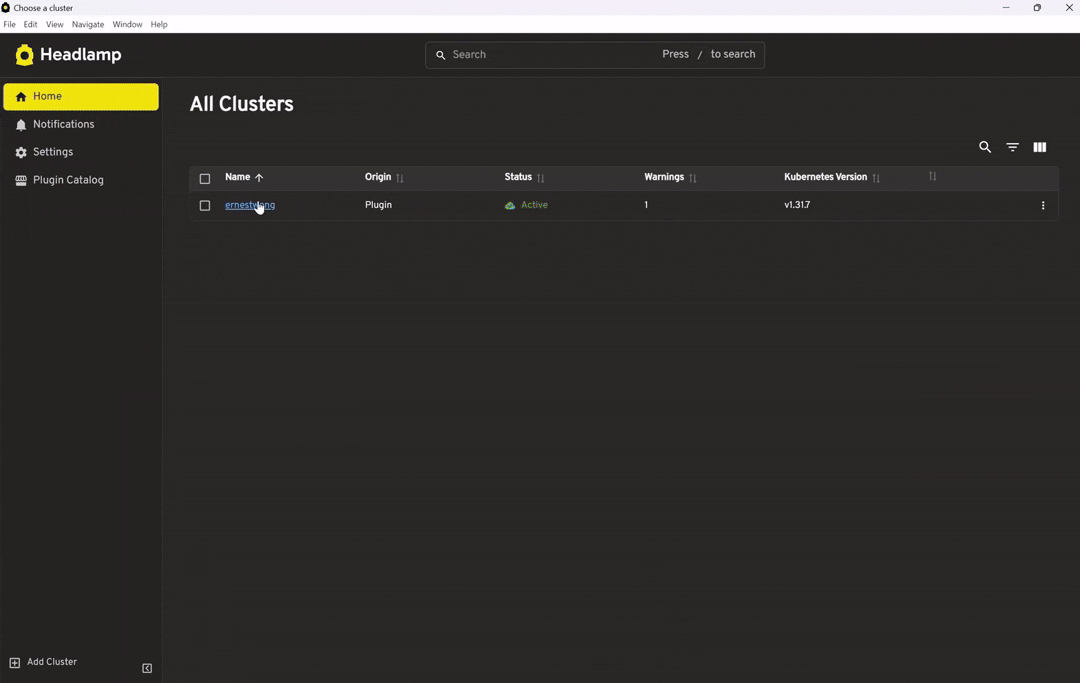
- A Kubernetes cluster with the KAITO controller deployed
- Sufficient GPU resources (Standard_NC24ads_A100_v4 or Standard_NC96ads_A100_v4 instances recommended)
Step 1: Explore the Model Catalog
Model Catalog Features
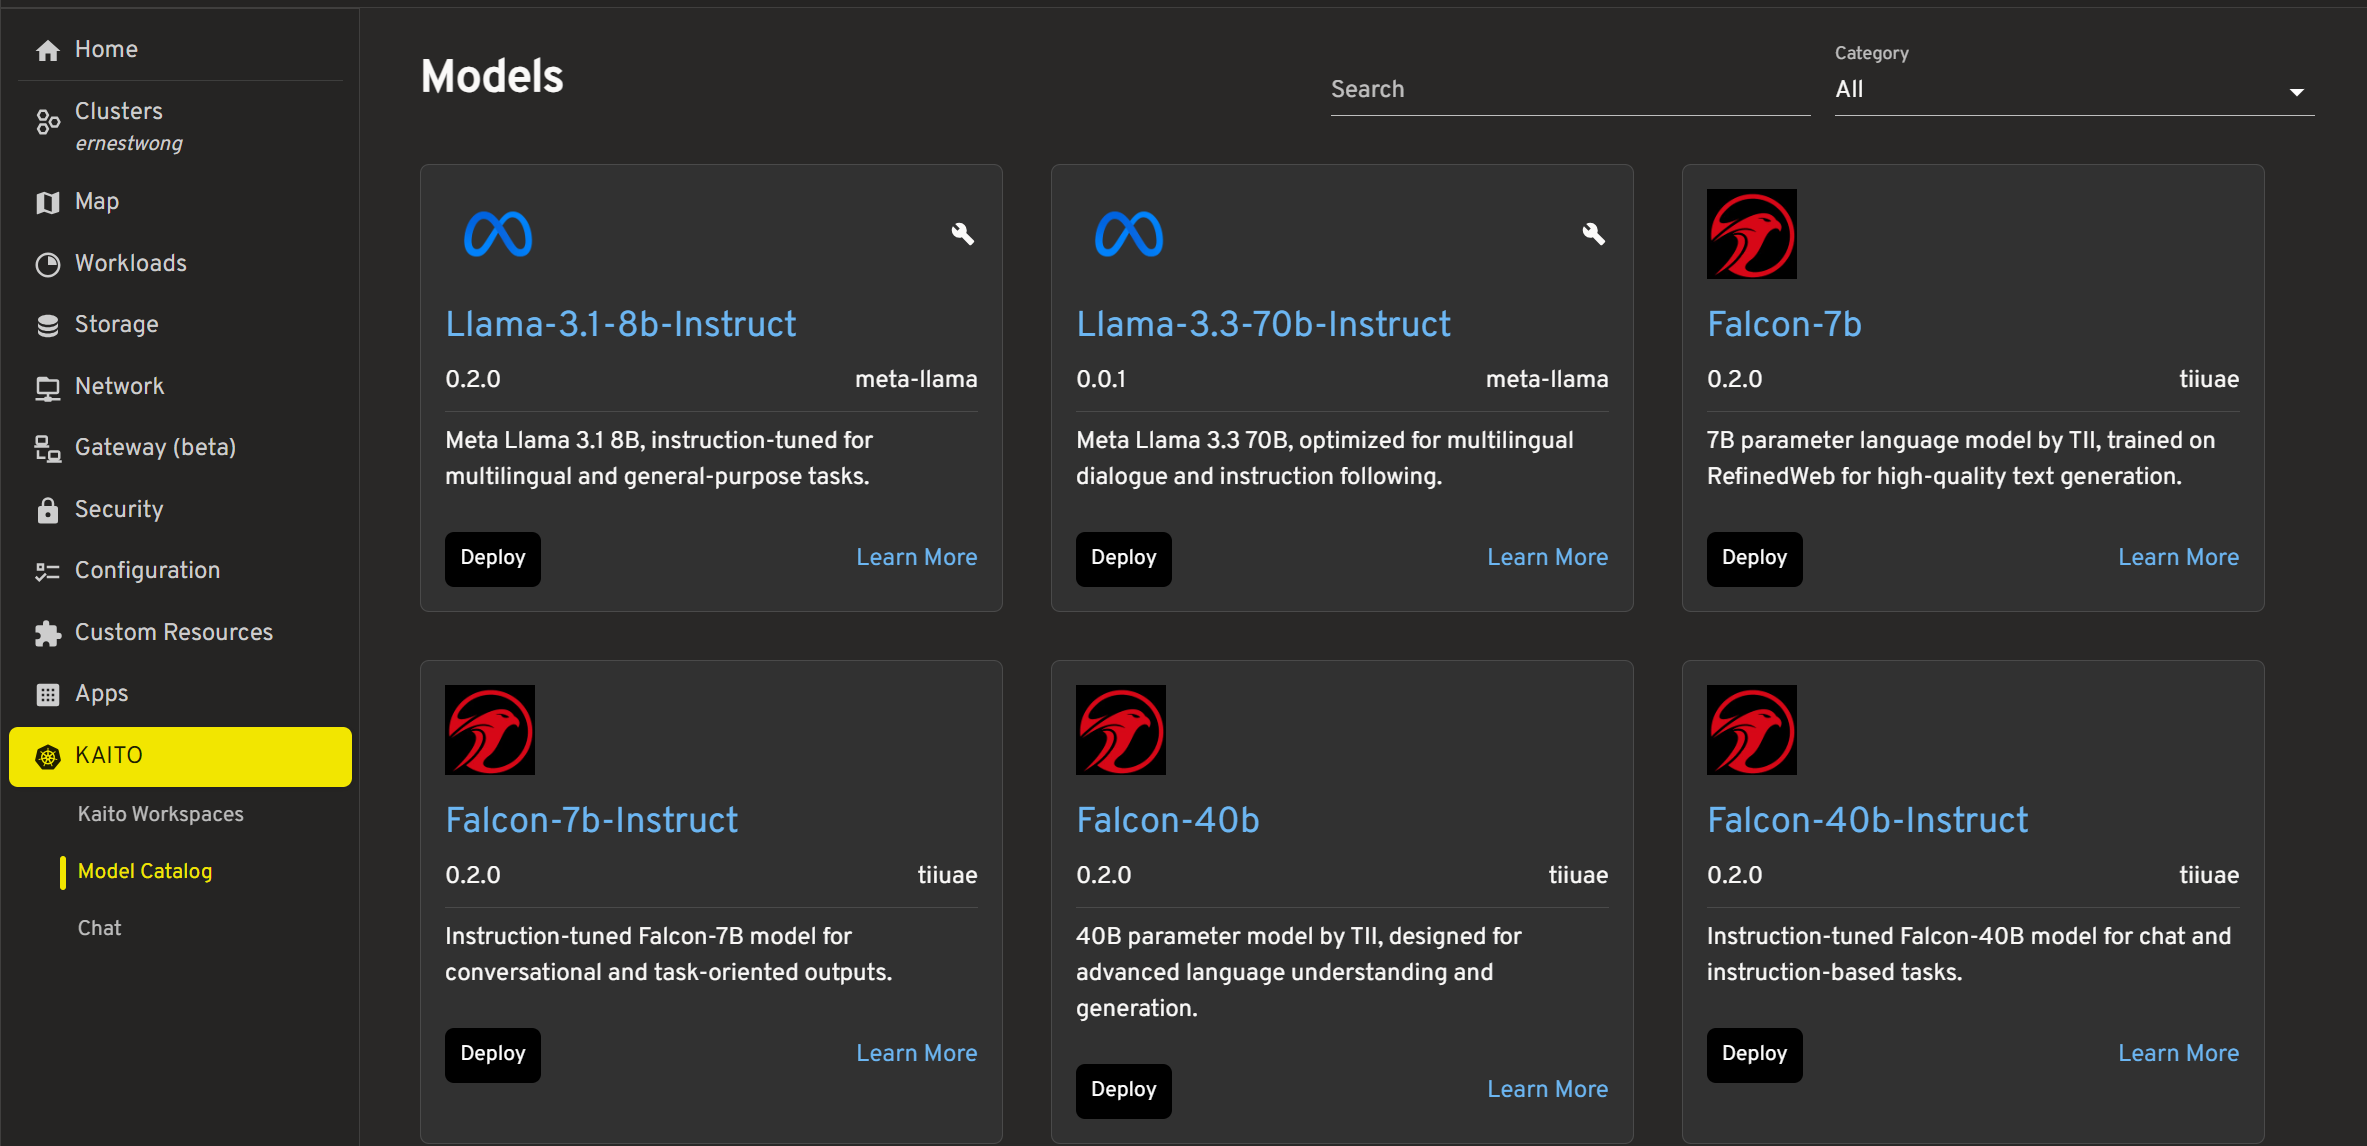
The model catalog provides a list of KAITO Preset models with filtering and search capabilities:
| Feature | Description |
|---|---|
| Search | Filter models by name |
| Category Filter | Filter by company (Meta, Microsoft, etc.) |

Step 2: Deploy Your First Model
Deploying a Model
- Select a model from the catalog based on your requirements
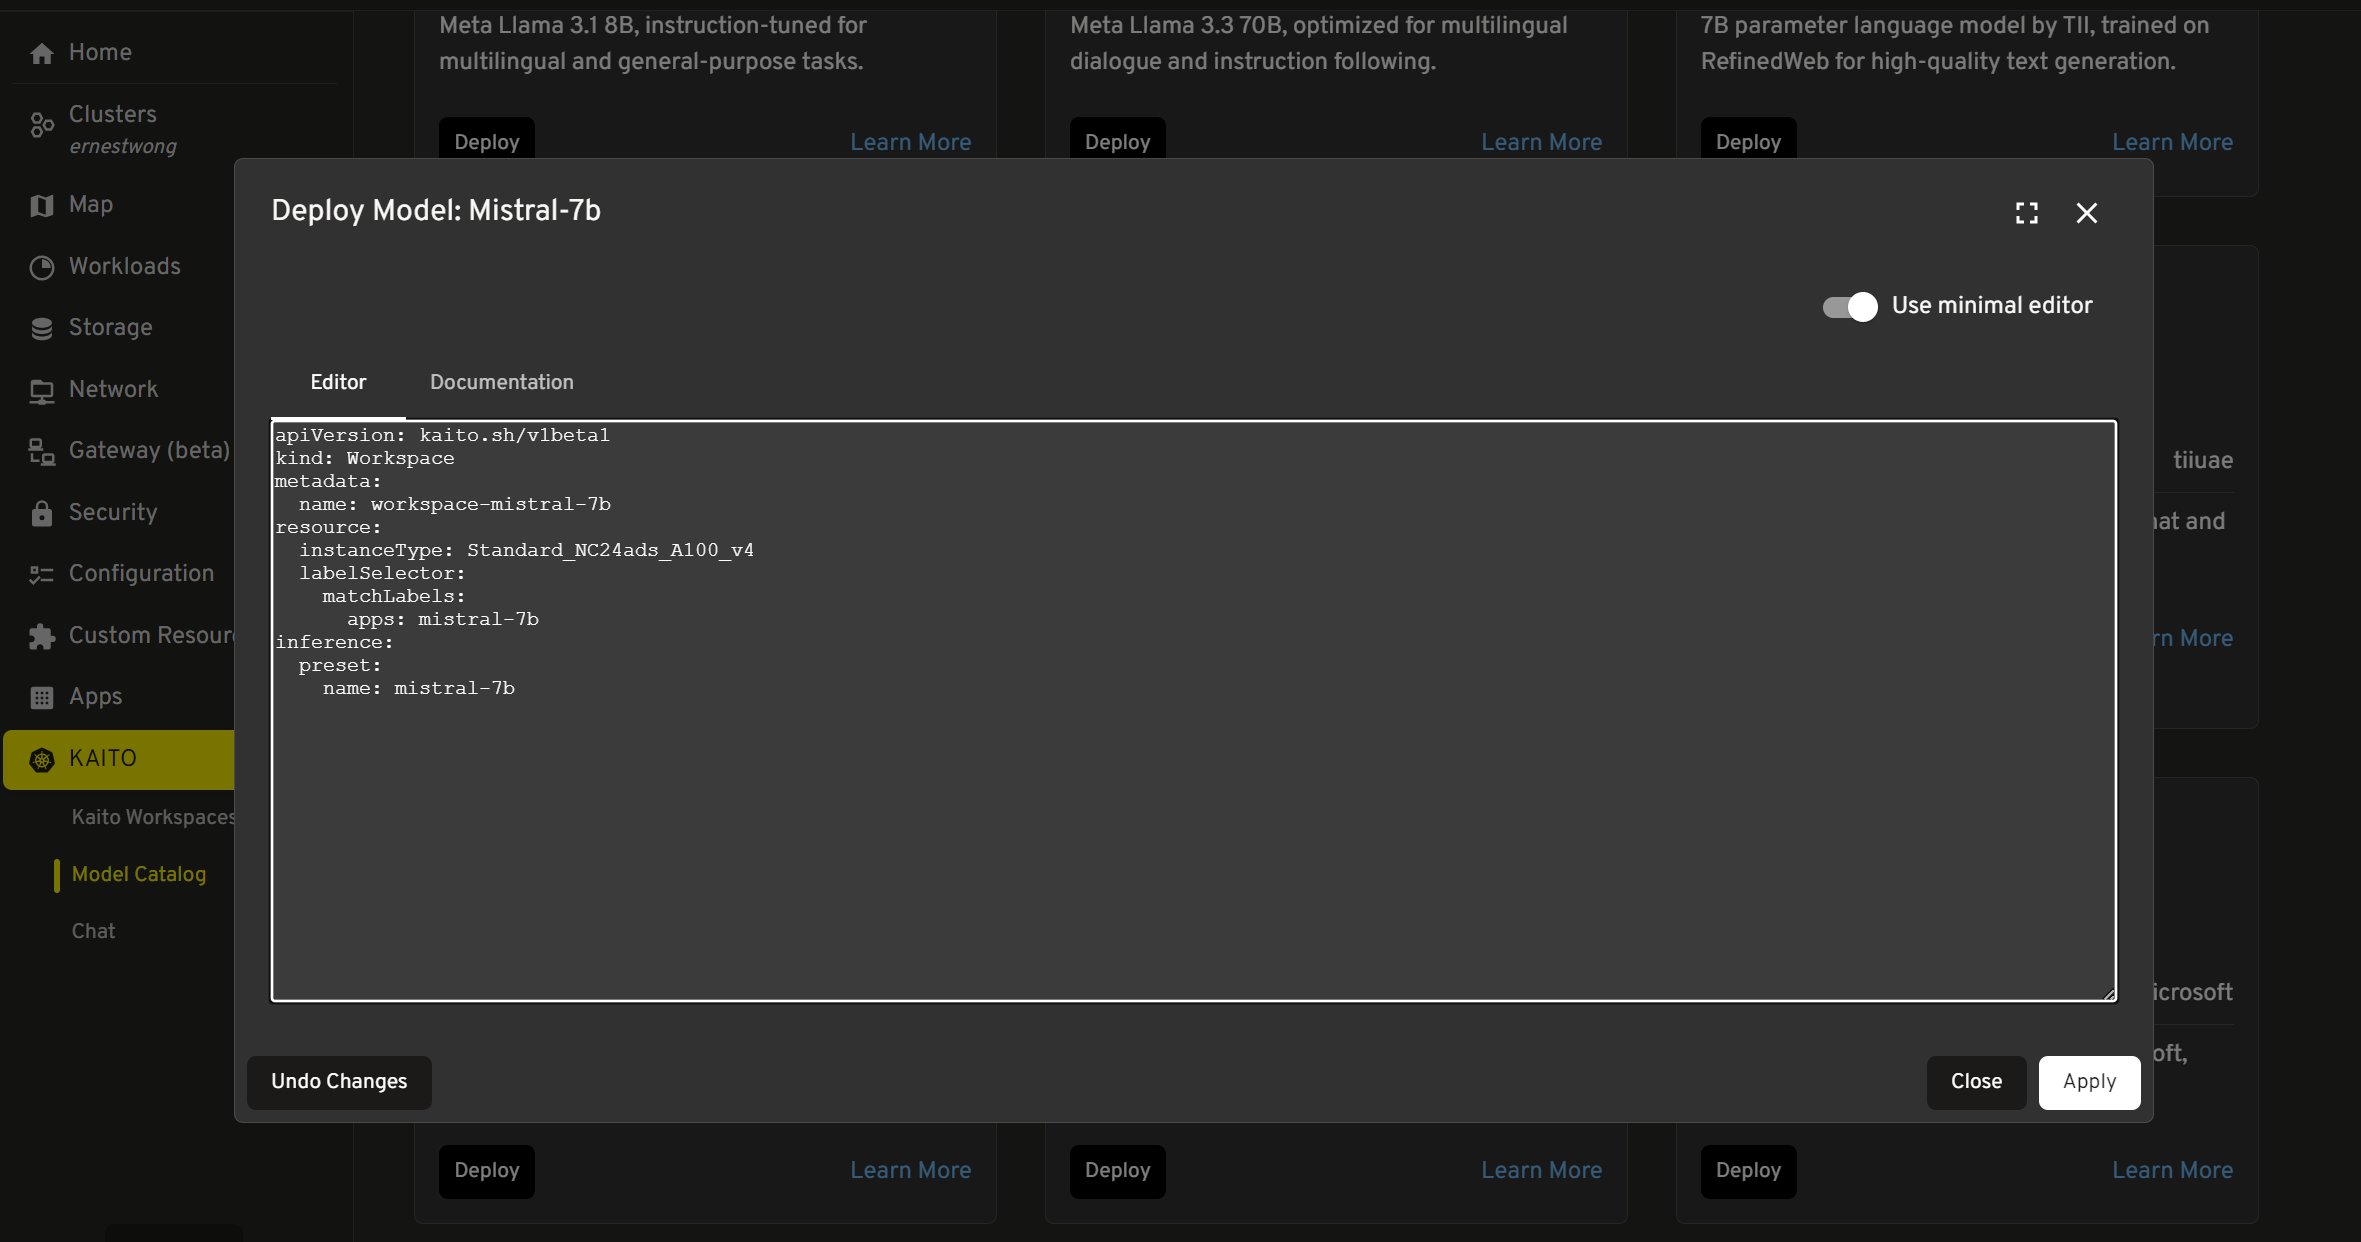
- Click "Deploy" to open the YAML editor dialog
- Optionally specify nodes for deployment. For more information, see multi-node-distributed-inference.
-
Review the generated Workspace YAML which includes:
instanceType(automatically selected based on model size)preset.name(the model identifier)presetOptions(for models requiring access tokens)
-
Modify the YAML if needed (namespace, resource requests, etc.)
- Note: You need to edit the YAML in order to deploy it, even if that means just removing a space at the end!
-
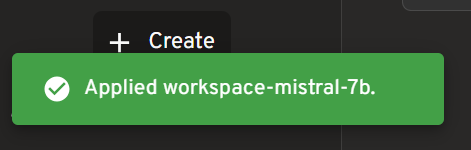
Click "Apply" to deploy the Workspace resource to Kubernetes. Wait a few minutes and there will be a visual indicator if the workspace was successfully created.
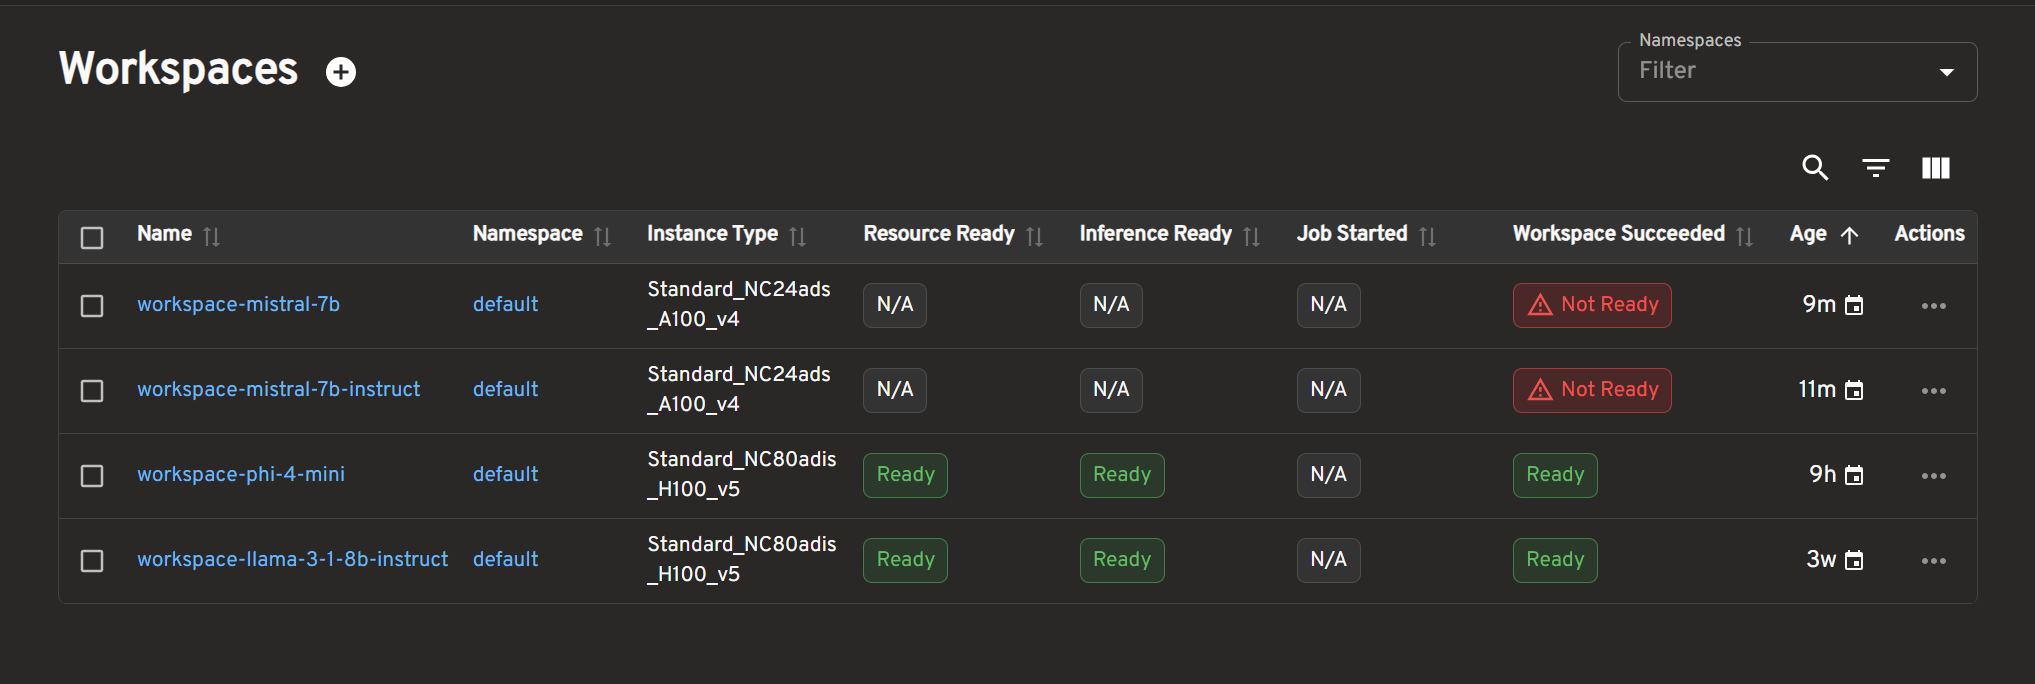
Check Workspace Status
Navigate to the Kaito Workspaces via the left sidebar. The workspace list displays critical status information:
| Column | Description |
|---|---|
| Resource Ready | GPU nodes provisioned |
| Inference Ready | Model pods running |
| Job Started | Deployment job active |
| Workspace Succeeded | Overall success status |
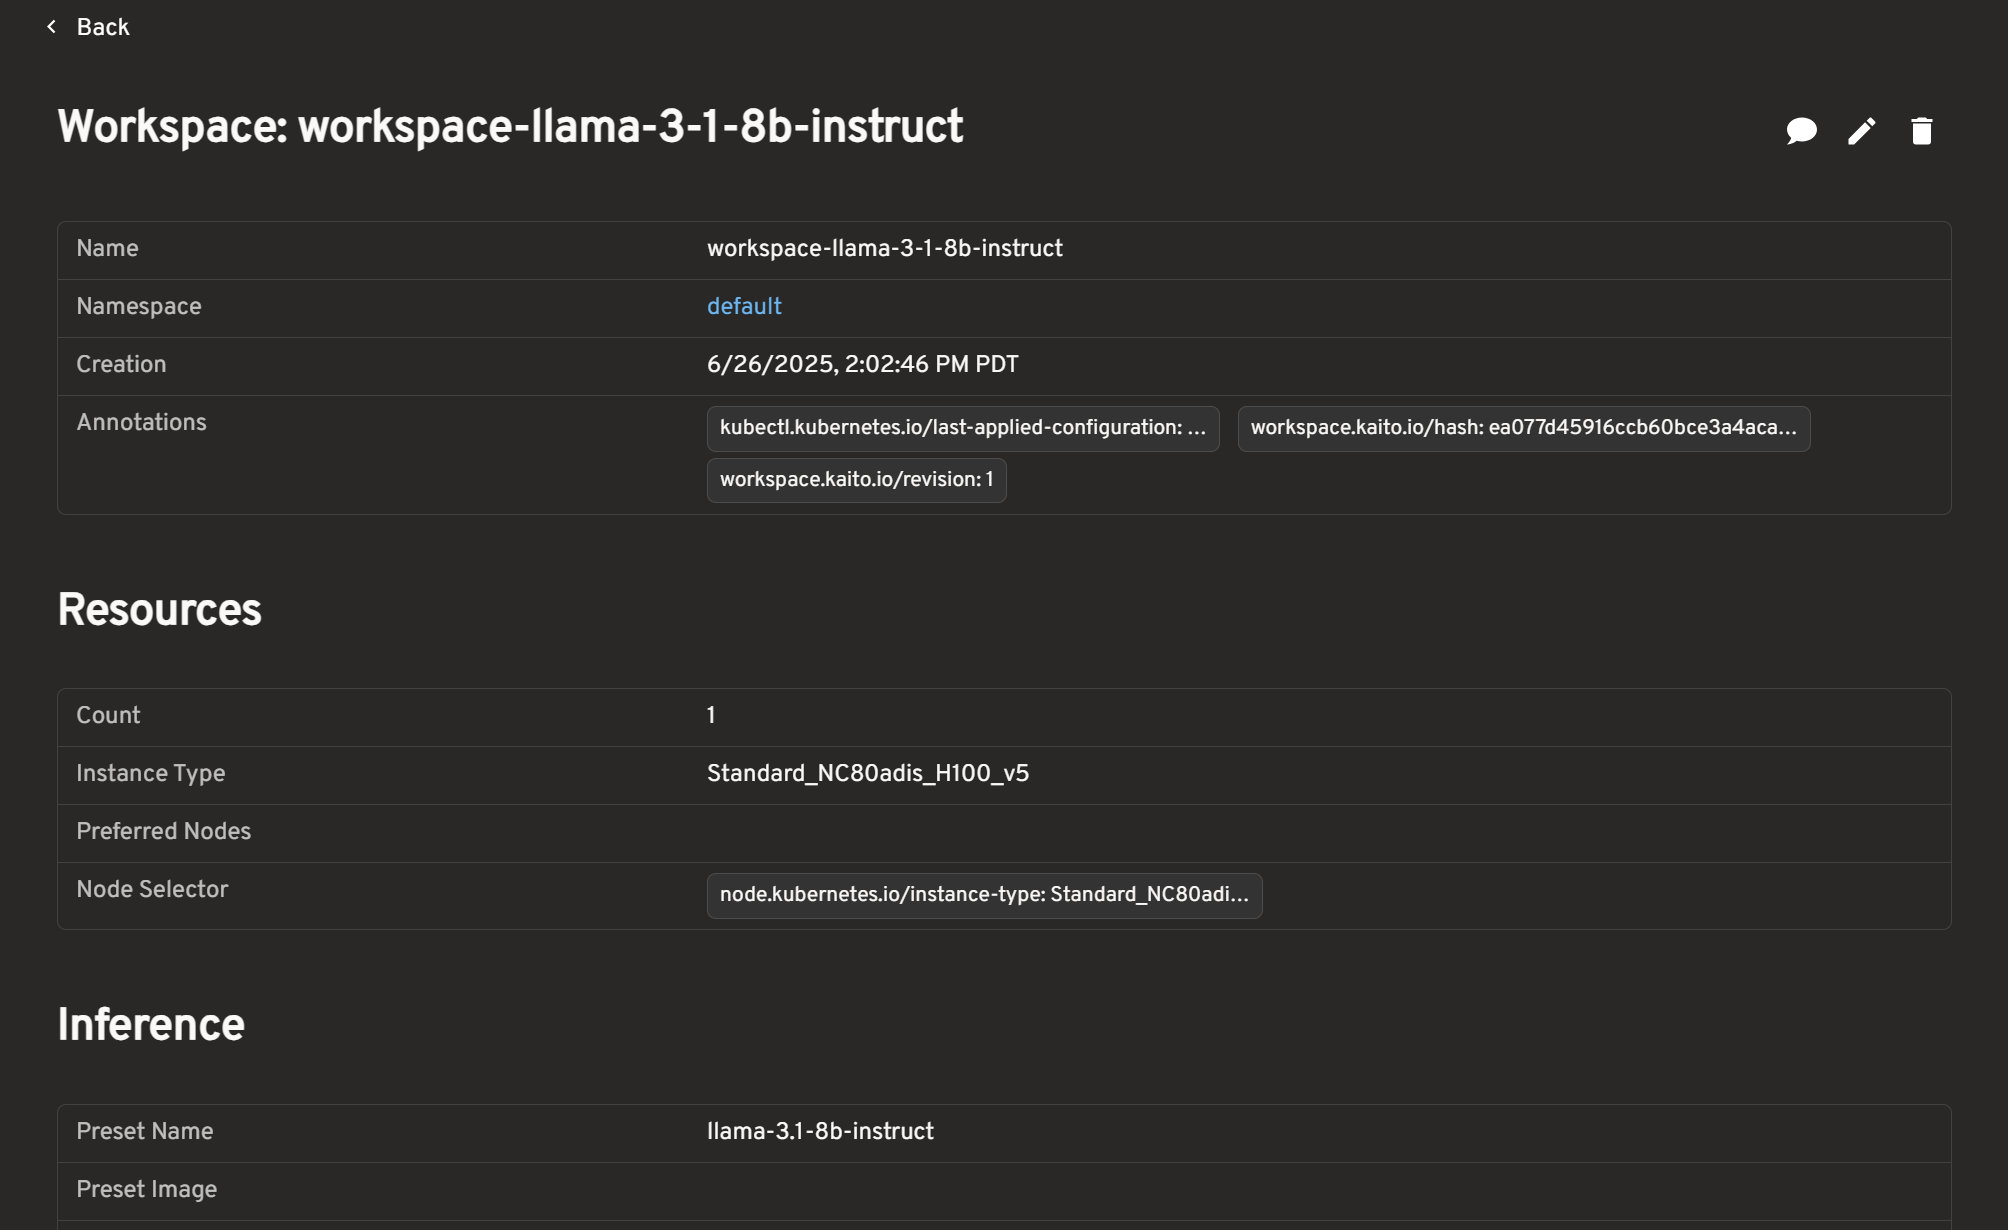
Workspaces Detail Features
Click into any of your workspaces to see the following features:
| Feature | Description |
|---|---|
| Workspace Details | View Workspace name, Creation details, Annotations |
| Resources | View Count, Instance Type, Preferred Nodes, Node Selector |
| Inference | View Preset Name and Image, Config details, Adapters |
| Status | See real-time deployment and health status |
| Conditions | View all status conditions and their messages for troubleshooting |
| Events | View recent events and logs for each workspace |
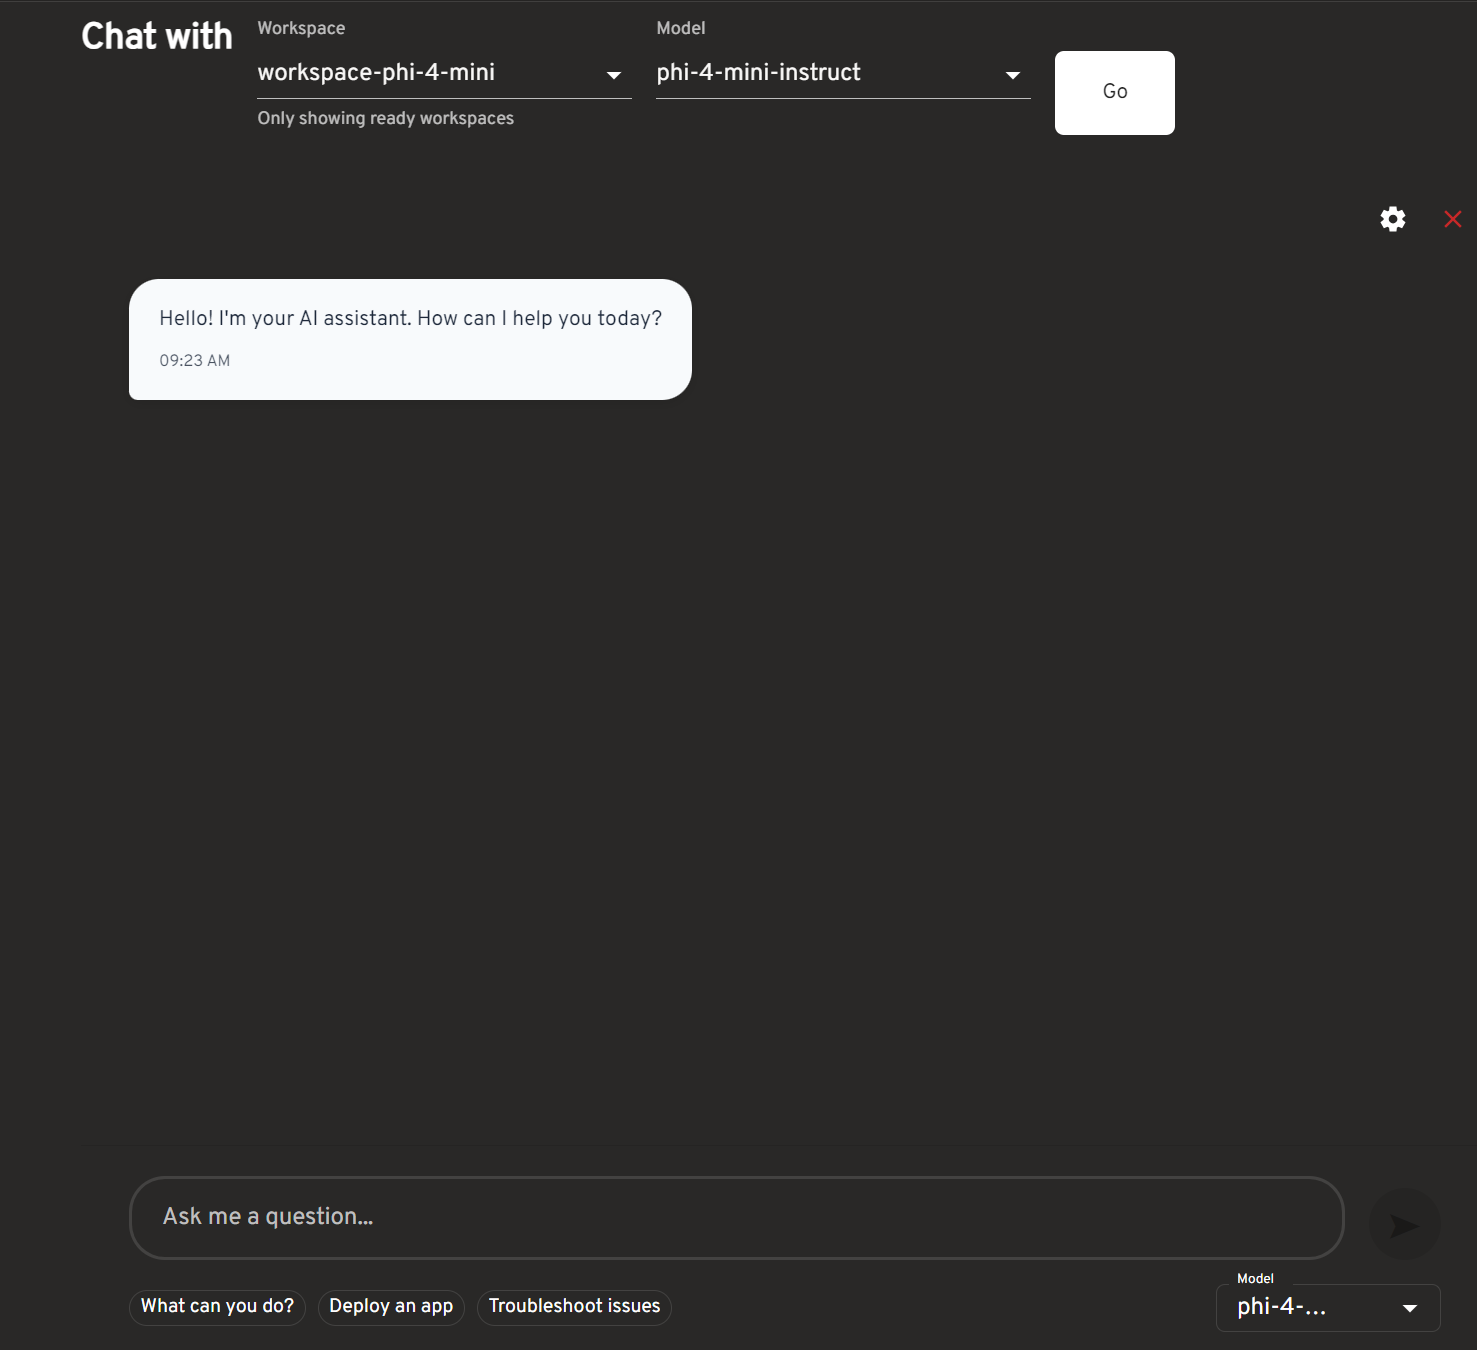
Step 3: Chat with Deployed Model
Once your workspace shows "Inference Ready", you can interact with the model through the chat interface.
Starting a Chat Session
Starting a Chat Session from the Chat Page
-
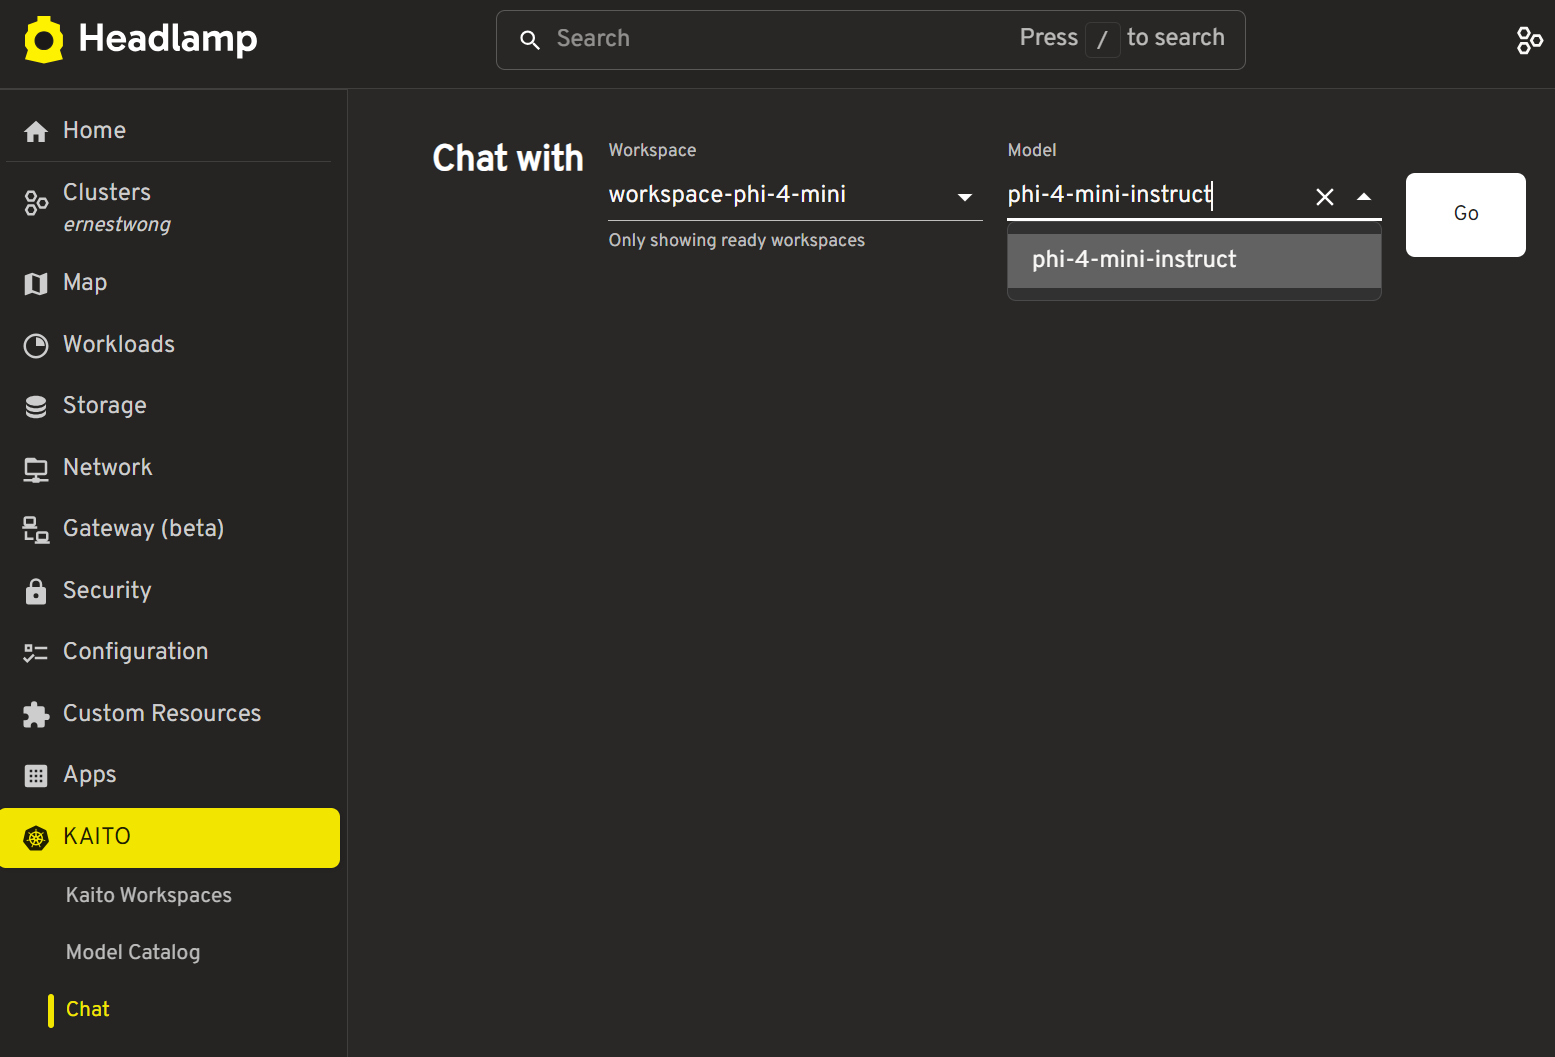
Navigate to
Chaton the left sidebar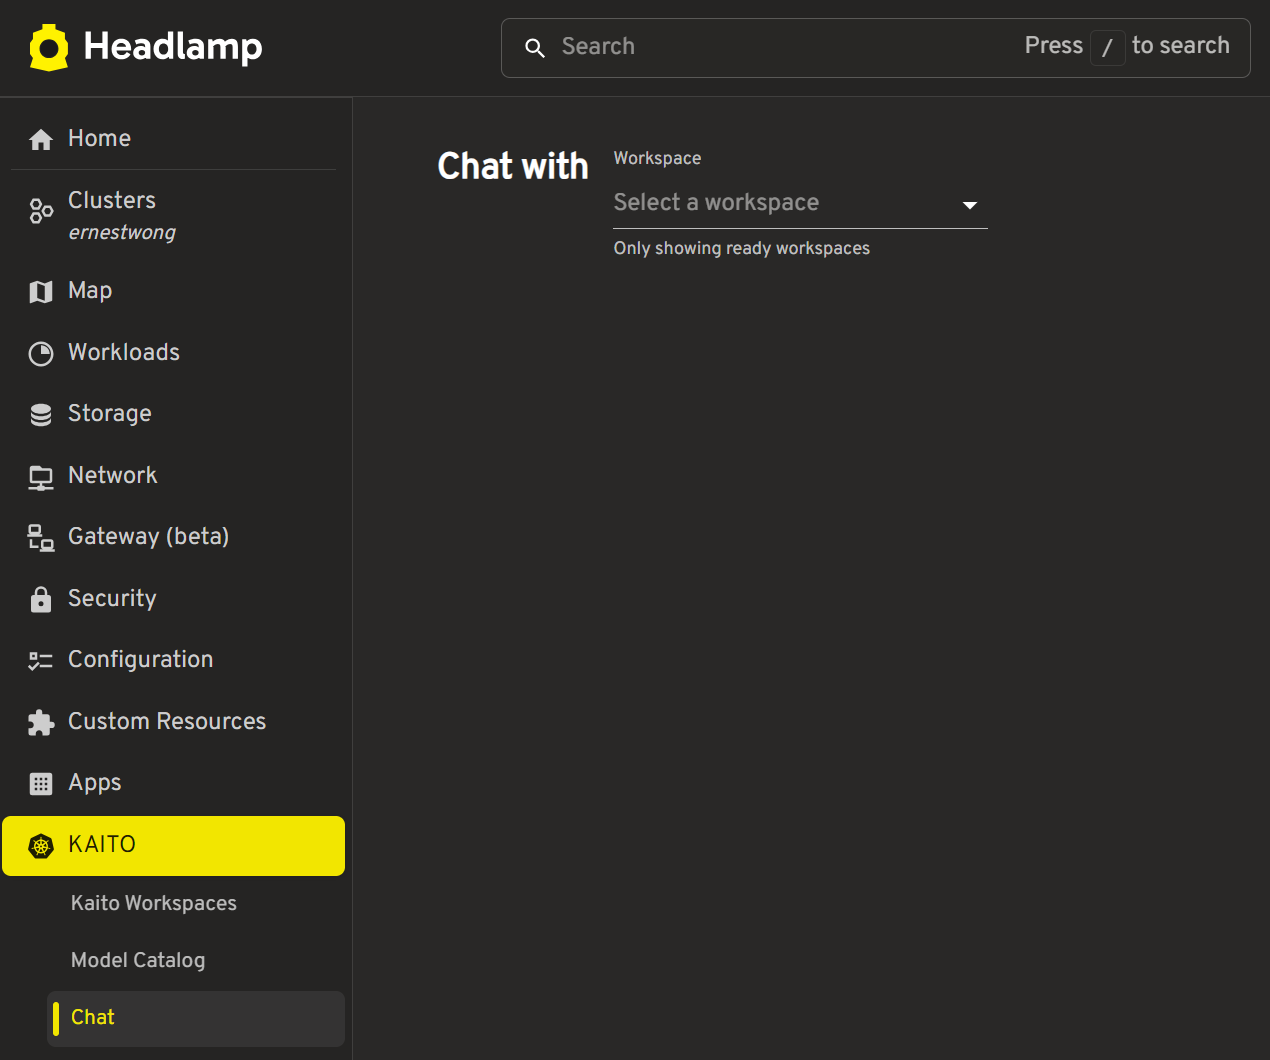
-
Select a workspace from the dropdown, then select a model from that workspace
-
Click "Go"
-
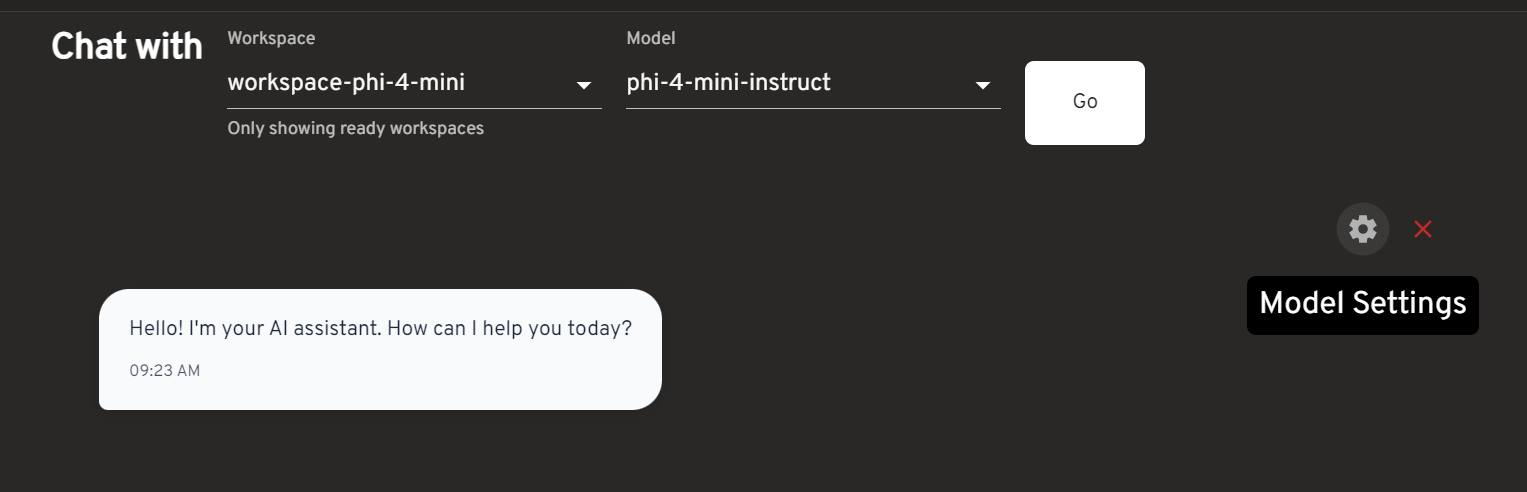
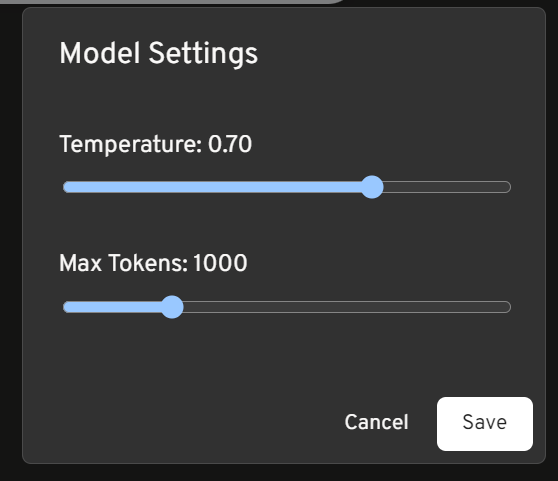
Configure model settings if desired, then chat with your model!
Starting a Chat Session from the Workspaces Page
- Click into your workspace to view its details
- Click the Chat icon on the upper right
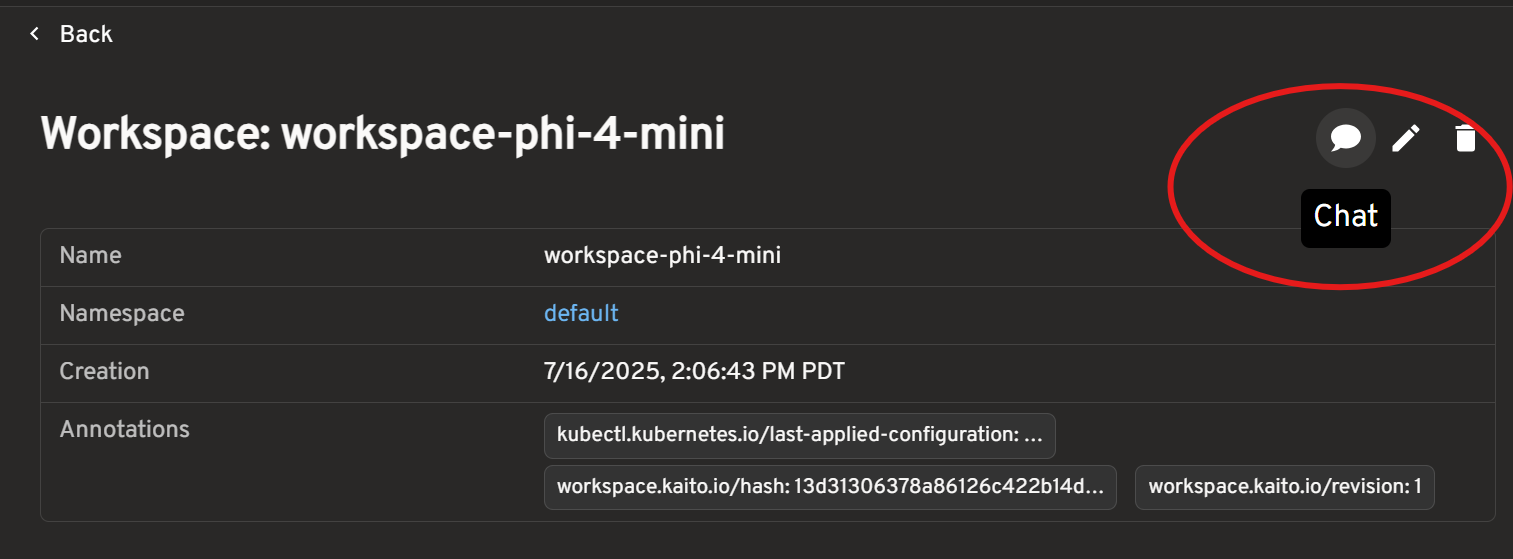
- Configure model settings if desired, then chat with your model!
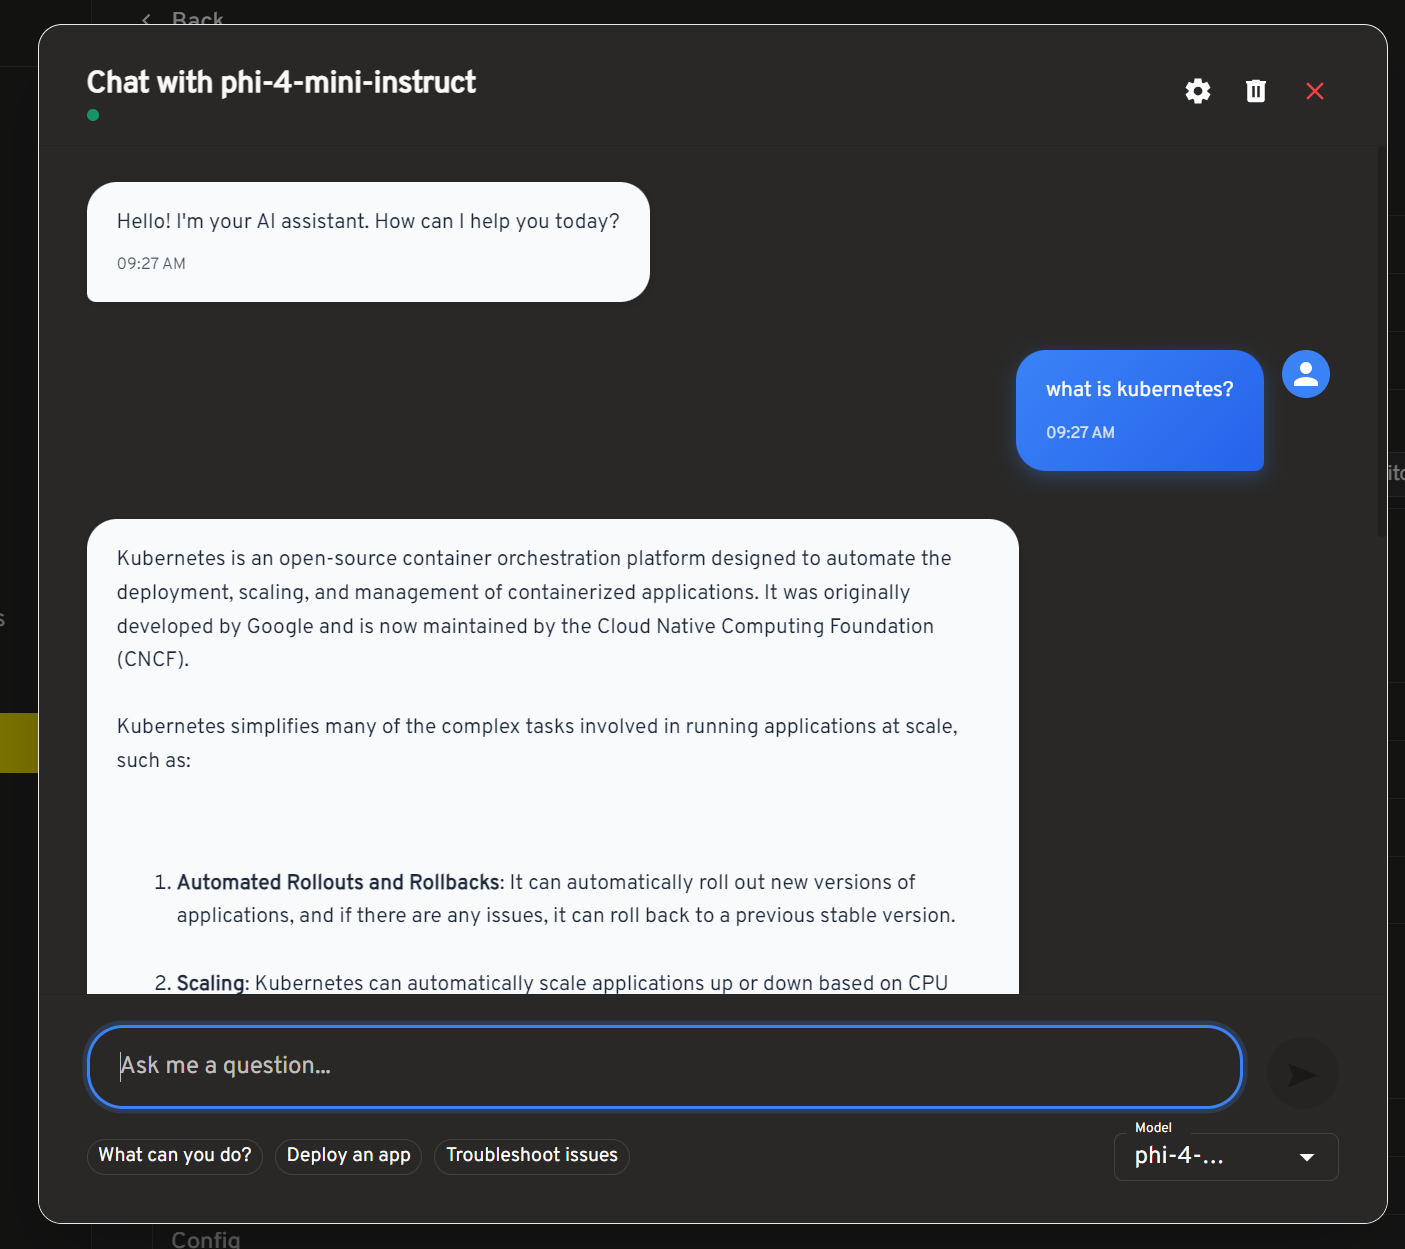
Chat Interface Features
The ChatUI component provides a full-featured chat experience:
| Feature | Description |
|---|---|
| Message Streaming | Real-time response display |
| Model Selection | Choose from available models |
| Message History | Conversation persistence |
| Markdown Support | Rich text formatting |
| Error Handling | Fallback responses |
Legacy CLI Method (Optional)
For users familiar with kubectl, you can also deploy models using YAML:
apiVersion: kaito.sh/v1beta1
kind: Workspace
metadata:
  name: workspace-phi-3-5-mini
resource:
  instanceType: 'Standard_NC24ads_A100_v4'
  labelSelector:
    matchLabels:
      apps: phi-3-5
inference:
  preset:
    name: phi-3.5-mini-instruct
Apply this configuration to your cluster:
kubectl apply -f phi-3.5-workspace.yaml
Monitor Deployment
Track the workspace status to see when the model has been deployed successfully:
kubectl get workspace workspace-phi-3-5-mini
When the WORKSPACEREADY column becomes True, the model has been deployed successfully:
NAME                     INSTANCE                   RESOURCEREADY   INFERENCEREADY   JOBSTARTED   WORKSPACESUCCEEDED   AGE
workspace-phi-3-5-mini   Standard_NC24ads_A100_v4   True            True                          True                 4h15m
Test the Model
Find the inference service's cluster IP and test it using a temporary curl pod:
# Get the service endpoint
kubectl get svc workspace-phi-3-5-mini
export CLUSTERIP=$(kubectl get svc workspace-phi-3-5-mini -o jsonpath="{.spec.clusterIPs[0]}")
List available models
kubectl run -it --rm --restart=Never curl --image=curlimages/curl -- curl -s http://$CLUSTERIP/v1/models | jq
You should see output similar to:
{
  "object": "list",
  "data": [
    {
      "id": "phi-3.5-mini-instruct",
      "object": "model",
      "created": 1733370094,
      "owned_by": "vllm",
      "root": "/workspace/vllm/weights",
      "parent": null,
      "max_model_len": 16384
    }
  ]
}
Make an Inference Call
Now make an inference call using the model:
kubectl run -it --rm --restart=Never curl --image=curlimages/curl -- curl -X POST http://$CLUSTERIP/v1/completions \
  -H "Content-Type: application/json" \
  -d '{
    "model": "phi-3.5-mini-instruct",
    "prompt": "What is kubernetes?",
    "max_tokens": 50,
    "temperature": 0
  }'
Next Steps
Congratulations! You've successfully deployed and tested your first model with the headlamp-kaito plugin.
After completing this quick start:
- Explore advanced features in Core Features
- Customize model settings using the settings dialog (⚙️ icon in chat)
Additional Resources
- Learn More: Explore the full range of supported models in the presets documentation
- Advanced Usage: Learn about workspace configurations
- Contributing: See how to contribute new models